How to Add a Shift Using the POS
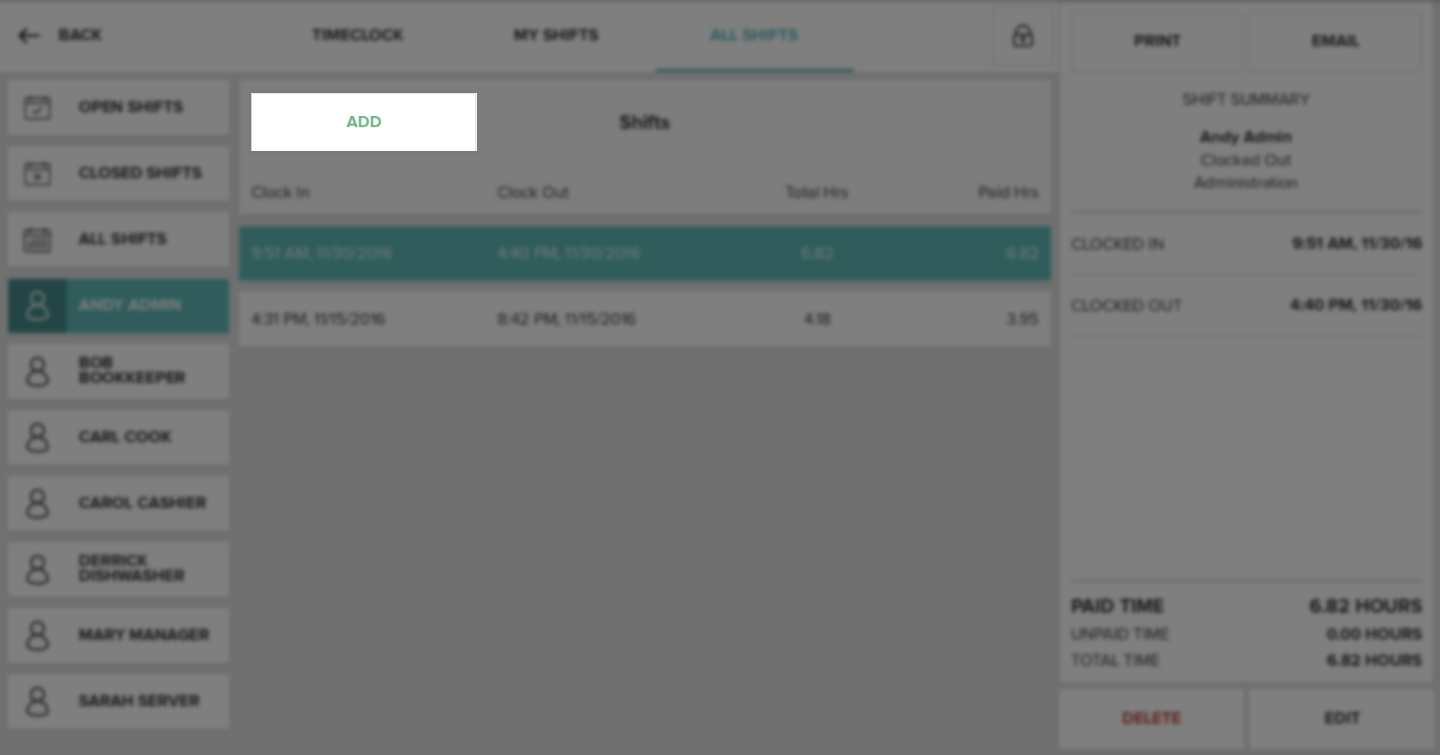
To add a shift using the Vital Select, begin by selecting the Timeclock button on the home screen, then select the All Shifts tab on the top of the screen. This will take you to the All Shifts screen.
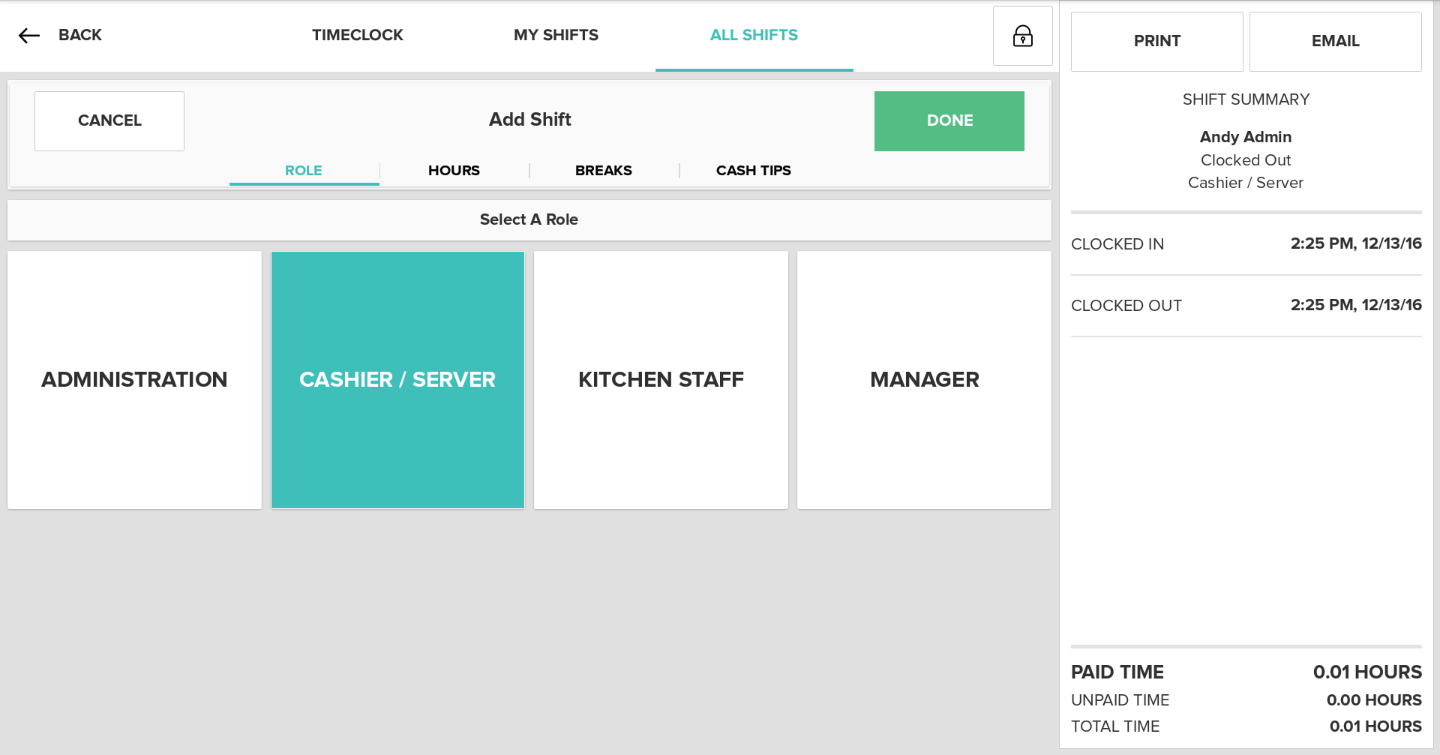
On the left side of the All Shifts screen, locate the user you wish to add a shift to and tap on their name. Then select the Add button located on the top of the page. This will take you to the Add Shift screen.
On the Add shifts screen, if a user has multiple roles you will have to option to select a role for that user to be listed under for that shift.
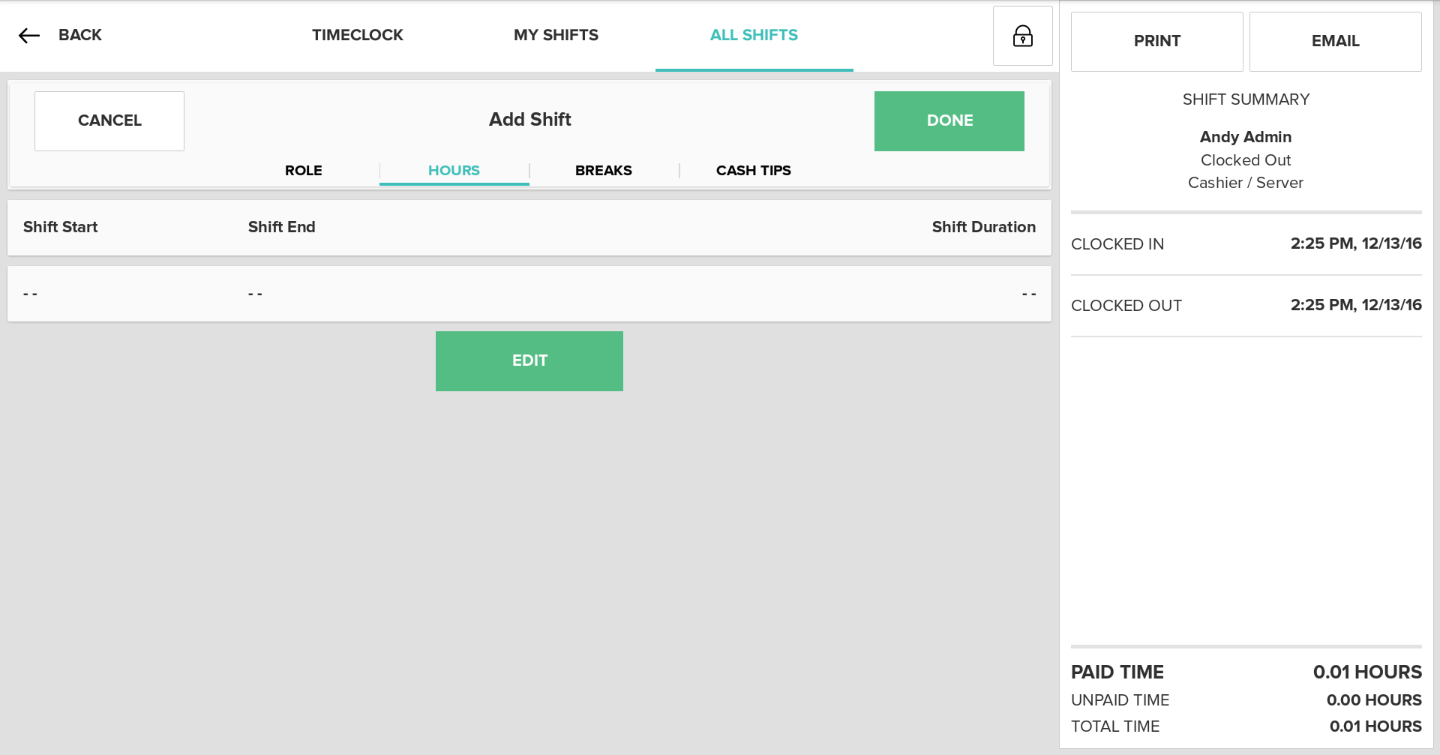
Select the Hours tab on the top of the page, and then press the Edit button. This will cause a pop-up to appear. Enter in the times and dates needed for the shift, then select the Set Time button on the bottom right of the pop-up to save the dates and times for the shift.
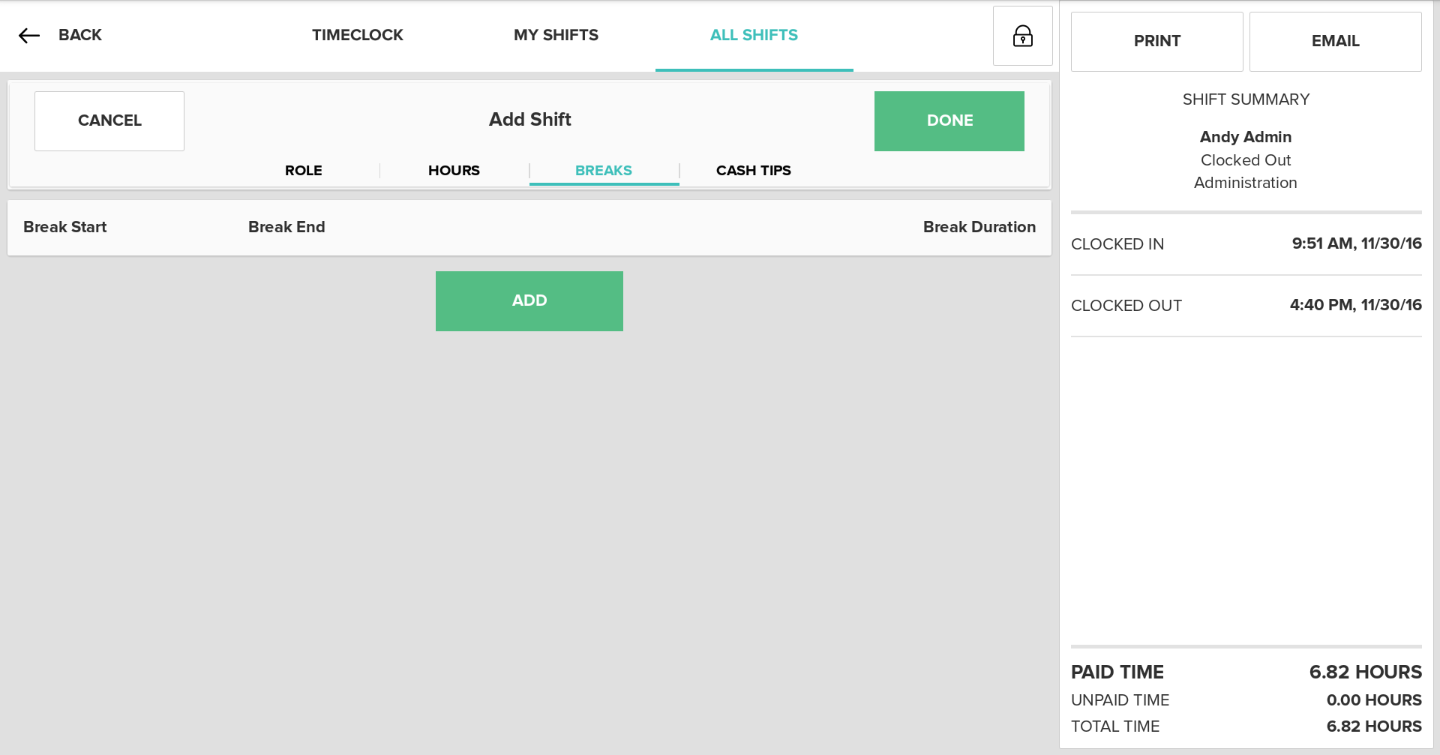
Then select the Breaks tab and press the Add button. This will cause a pop-up to appear. Enter the times and dates needed for the shift, then select Set Time button on the bottom right of the pop-up to save the dates and times for the shift.
If the User is clocked in as a role that can accept tips, and they need to be entered, select the Cash-Tips tab. Enter the cash amount the user received in tips.
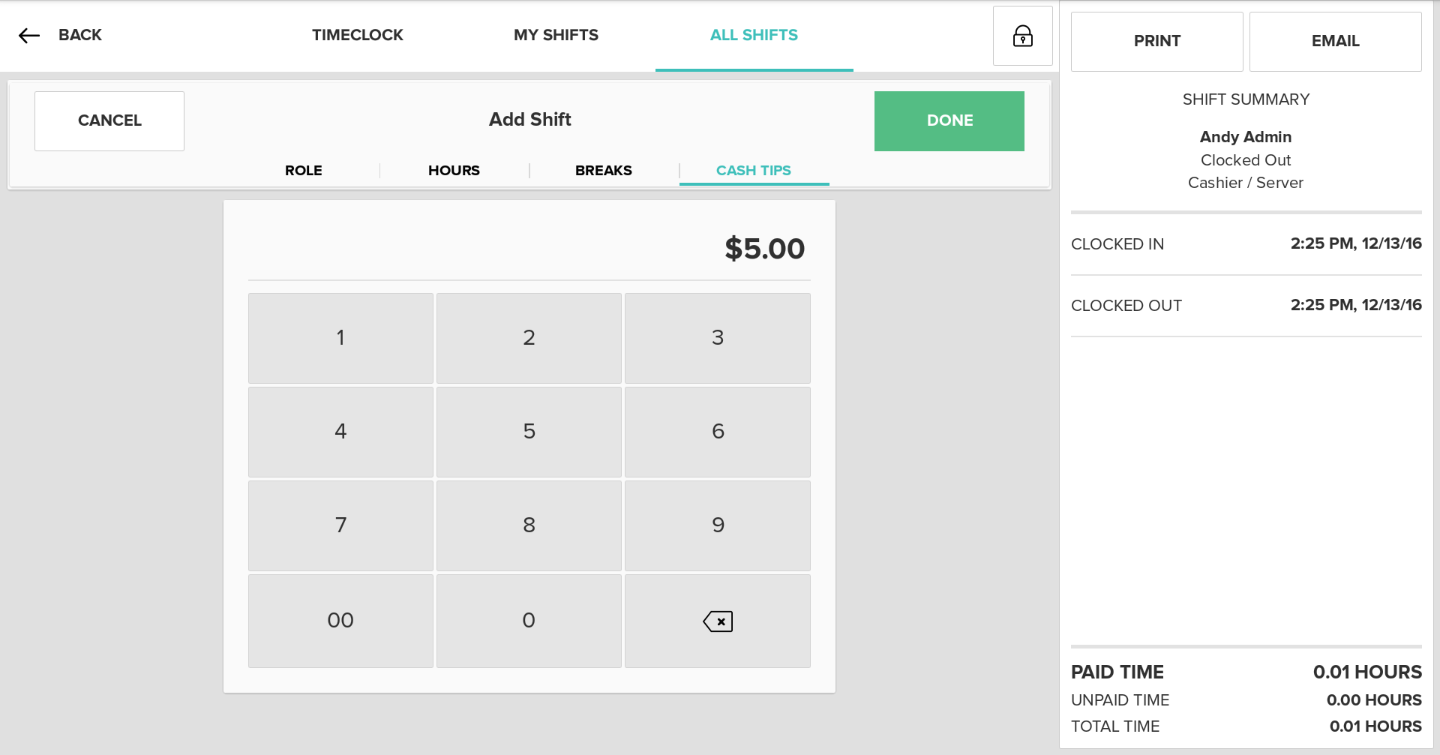
Select the Done button to save the shift when finished. You will be taken back to the All Shifts screen.
Step by Step Summary
- Select the Timeclock button on the home screen, then select the All Shifts tab on the top of the screen.
- Locate the user you wish to add a shift to and tap on their name.
- Select the Add button located on the top of the page.
- Select a role for that user.
- Select the Edit button on the Hours tab and enter times and dates for the shift.
- Select the Add button on the Breaks tab and enter times and dates for the shift.
- If available, select the Cash Tips tab and enter the tip amount.
- Select Done when finished to add the shift for the user.