How To Add Modifier Sets
Modifier Sets are an organized collection or group of Modifiers that can be assigned to Items in the Merchant Portal. Instead of assigning these modifiers to Items individually you have the option of creating and assigning Modifier Sets to an Items as a group.
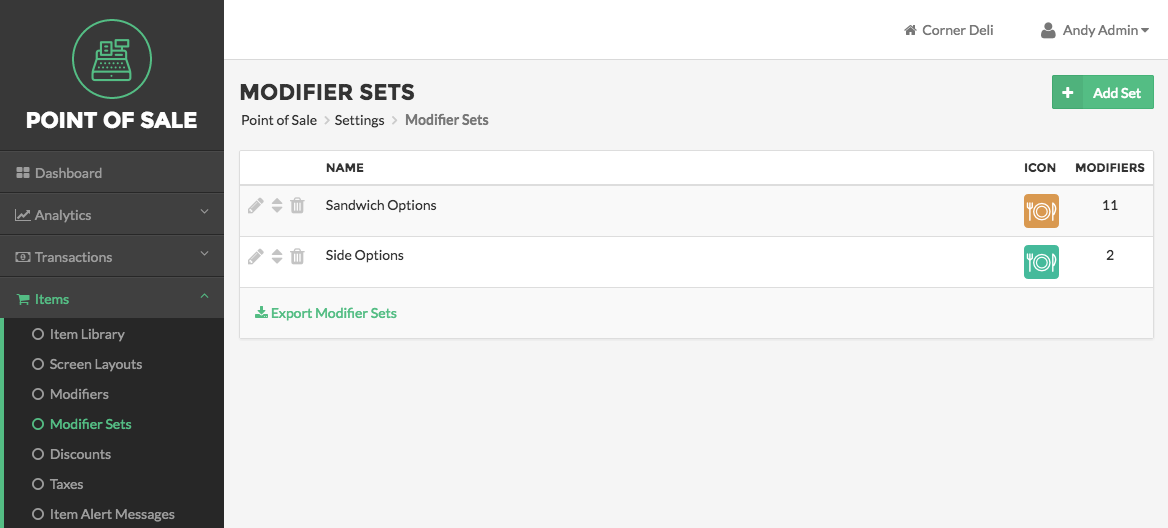
To add a new Modifier Set, first select Items on the left side of the Navigation Menu, and then choose Modifier Sets under the listings. On the Modifier Sets screen, click the Add Set button on the top right corner of the screen. You will then be directed to the Add Modifier Set page.
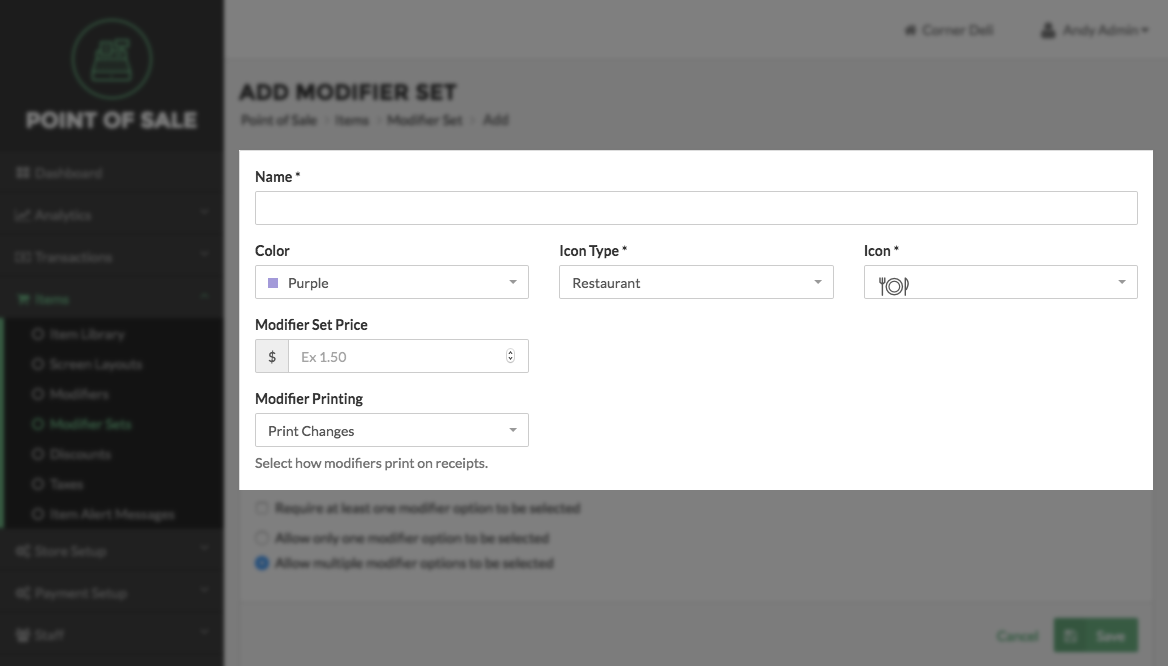
On the Add Modifier Set page, enter a Name for the Set. Make sure it is unique and descriptive. Then select a Color, Icon Type, and Icon for the Set. These fields are all required. If you would like to set a Price for the Modifiers within the Set, enter it in the text box below Price. This will override the Account Level Prices you set for your Modifiers when you created them originally. Next, select a Modifier Printing option from the drop down menu. This determines whether or not Modifiers will be printed under the Items they are applied to on the customer Receipt. Selecting Never Print will not print any Modifiers on the Receipt. Selecting Print Default Changes will only print Modifiers on the Receipt if you deselect a Default Modifier, removing it from the Item. Selecting Always Print will print all Modifiers that you add on the Receipt.
Note:
These options only affect what appears on the Receipt printed and given to the customer. Modifiers that are added to Items that need to be printed at a Station Printer will be automatically printed, despite what you select on this page.
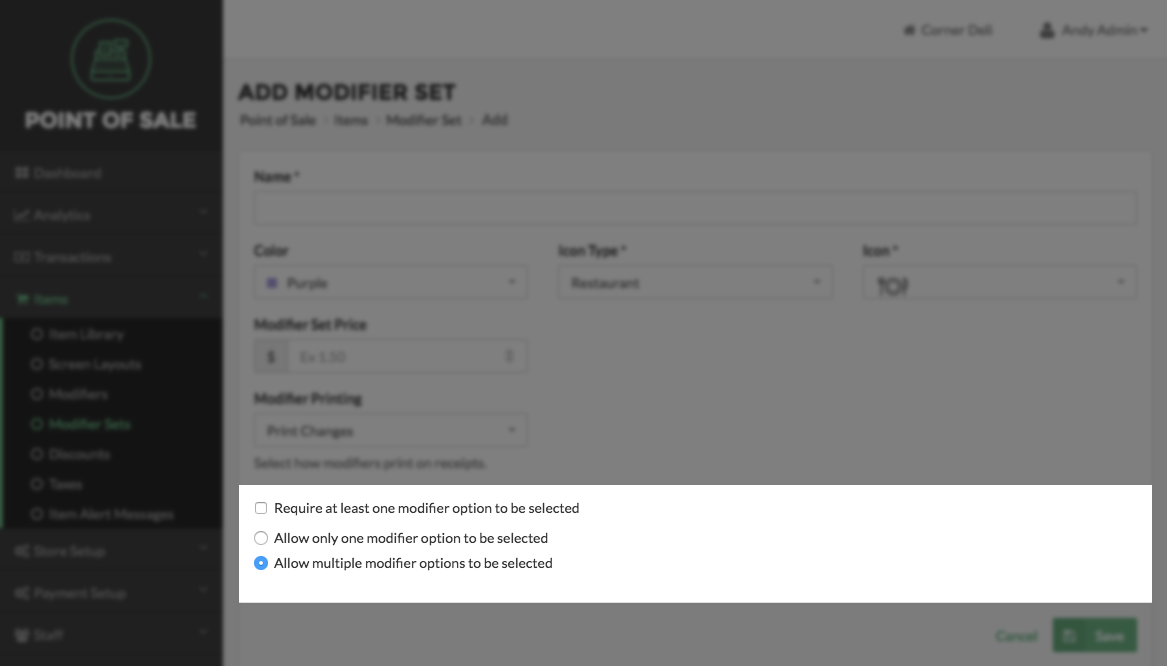
Next, select if the Modifier Set is Required or Optional. Choosing Required means that a Modifier must be added to the Item. If you select a Item for an Order using the [[[Undefined variable Brandning.ProductName]]] POS app, that has a Required Modifier Set , when you add that Item to the order you will be automatically taken to the Modifiers Screen where you will need to select a Modifier for the Item. Selecting Optional will not direct you to the Modifiers Screen when adding an Item with an assigned Modifier Set to an Order. Rather, if the customer wants to add a Modifier, you will have to navigate to the Modifiers Screen manually and select the desired Modifiers from the assigned Modifier Set for that Item. Then choose whether the Modifier Set will be Single Select of Multi-Select. If you choose Single Select, you will only be able to add one Modifier from the Modifier Set to a Item. If you choose Multi-select, you will be able to add as many Modifiers as you like to a Item.
Click the Save Button to save your entries. You will be taken to the Edit Modifier Set Screen to finish the Add Set Process. If you do not wish to save your work, click Cancel. You will be directed back to the Modifier Sets Screen.
Step by Step Summary
- Select Items on the left side of the Navigation Menu, and the choose Modifier Sets from the listings
- Click the Add Set Button in the top right corner of the screen
- On the Add Modifier Set Screen, enter a Name for the Set
- Then select a Color, Icon Type, and Icon for the Set (required)
- Enter a Price for the Modifier Set, if desired (not required)
- Select a Print Option from the Modifier Printing Drop Down Menu
- Select either Required or Optional
- Select either Single Select or Multi-Select
- Click the Save Button to save your entries and move to the Edit Modifier Set Screen
Concept Information
Related Tasks